
Upgrading applications with zero downtime
A methodology to upgrade applications in-place, with zero downtime for your users.
Introduction
In the DeltaBlue platform, it is very easy to upgrade the version of your application (eg PHP 7.0 → PHP 8.1).
There are 2 ways you can do it: either follow the steps described on this page, or perform the upgrade manually on the container. While a manual upgrade (eg apt-get update; apt-get install php8.0; …) might seem very quick, it can quickly go very wrong on many levels: the upgrade failed for some reason, config files not being updated correctly resulting in a broken webserver, the application code is not adapted to the new version, visitors on your website experiencing weird behavior during the upgrade, …
The DeltaBlue platform has a solution for this. In short: create a new application with the upgraded stackitem version, verify your application behaves correctly and when done, switch the URL’s from the old to the new application.
The only requirement for this is that the content of your application (js, css, images, …) is stored externally, eg on s3.
Here is a comparison of the 2 ways of upgrading:
| Manually (command line) | Through the platform | |
|---|---|---|
| Zero downtime | ❌ | ✅ |
| What knowledge is required | Knowledge of stackitem technology and upgrade instructions are required | No specific tech knowledge is required, everyone can do this |
| Maintenance page | Strongly recommended | Not needed |
| Test the upgrade | Not easy, as the site is still publicly available and a maintenance page might be in place. | Very easy. The upgraded version is not publicly accessible, so you have all the flexibility when testing. |
| Rollback | May take a while | Instant |
How to upgrade your stackitem version with zero downtime
For this tutorial, we assume you have a website “myawesomewebsite.com” which points to the application “Website v1”. It currently has PHP 7.1 which you want to upgrade to PHP 8.0.

Step 1: On the environment overview page, click the “Add application” button:
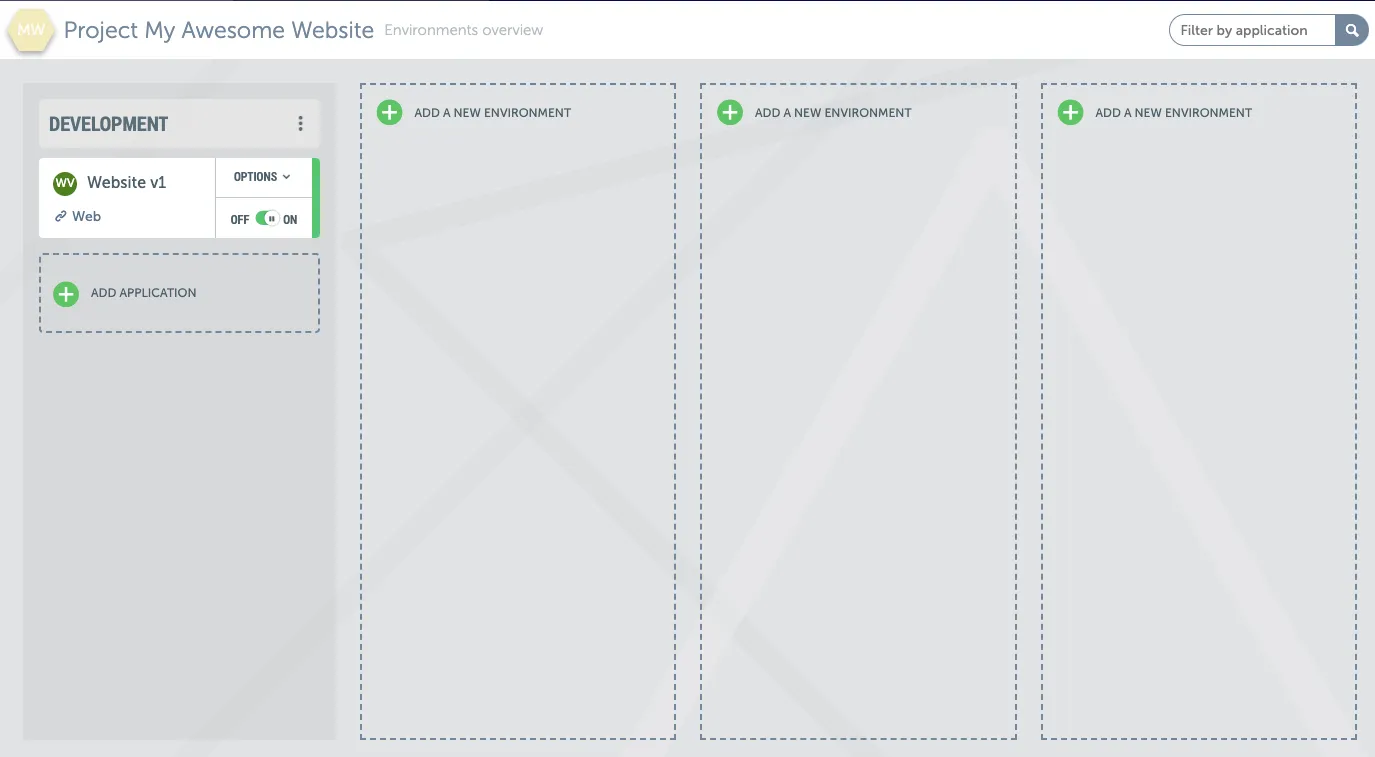
We named the new application “Website v2”.
Step 2: When setting up your stack, choose the desired technology and version
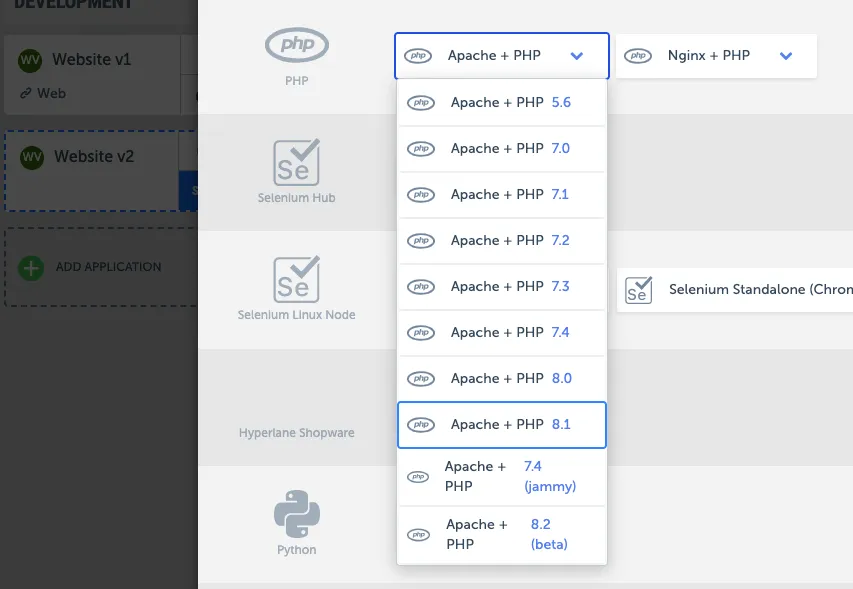
Setup the git, import variables and/or scenarios from the v1 application (when applicable).
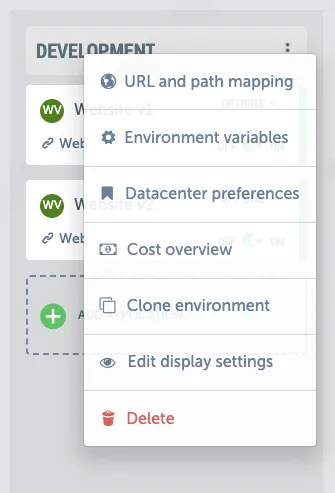
Step 3: On the environment overview page, click the 3 dots next to the environment name and click on “URL and path mapping” :
Step 4: Click the pencil icon next to the application name:
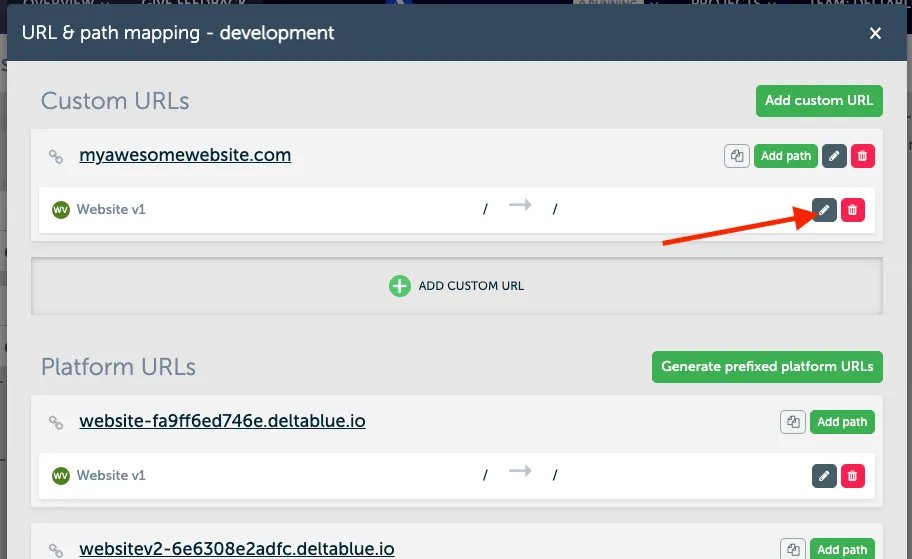
Step 5: Click the dropdown which currently says “Website v1” and choose “Website v2”:

Step 6: Click the green “Save” button:

You are all set! The website now points to the v2 application.
In case you want to rollback to the previous version, go back to step 3 (and onwards) and switch v2 → v1.