Linking a billing profile to a project
DeltaBlue
Linking a billing profile to a project
x min read
After your billing profile has been created, you need to link it to one or more projects.
To do this, follow these steps:
-
In the top right corner, click on your name, and then on “Account”
-
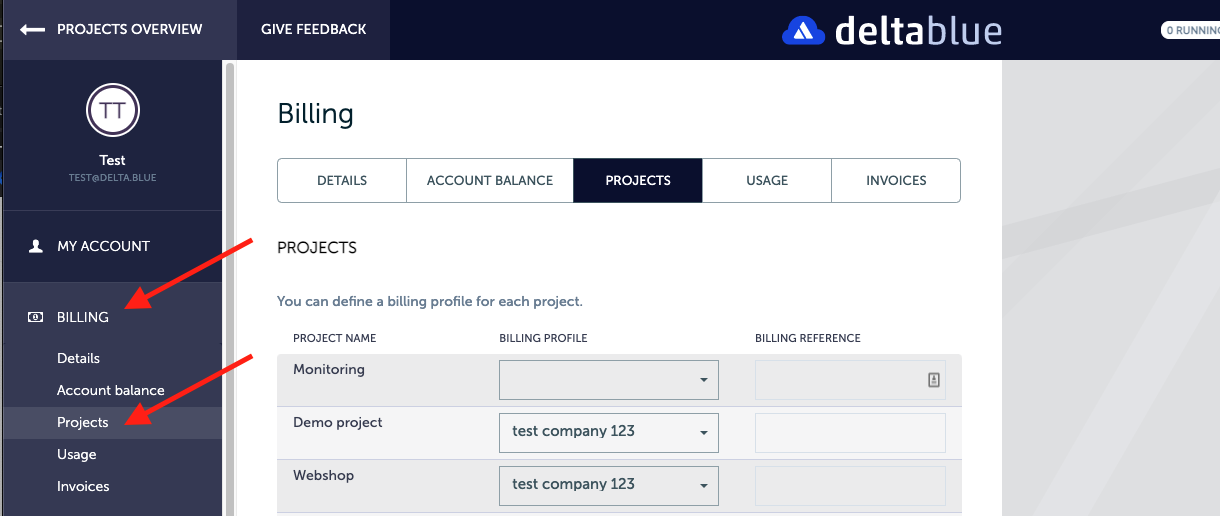
In the menu on the left, click on “Billing”. You should see at least 1 billing profile. If not, please follow the steps “Creating a billing profile”.
-
In the menu on the left, click on “Projects”. On this page, you’ll see an overview of all your projects and the associated billing profile
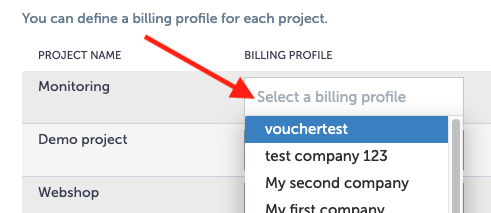
- To assign or change the billing profile of a project, click on the dropdown next to the desired project, choose the billing profile of your choice.
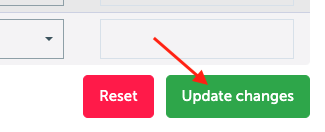
Then click the green “Update changes” button in the bottom right corner and you are all set!