x min read


Mathias Aerts
Cloud WizardIntroduction
Galera Cluster provides a multi-master setup for MySQL. It's a high available solution that provides high system uptime with synchronous replication in a scalable setup. If you are looking to scale your MySQL database, it can be a great fit.
Galera Cluster is developed by Codership as a plugin for standard MySQL. Percona leverages the Galera library in Percona XtraDB Cluster (PXC), which we have integrated in the DeltaBlue Cloud Platform. When setting up a MySQL stack item, you can choose the number of nodes, and cluster configuration will happen automatically.
Integration in the DeltaBlue Cloud Platform
Using the database cluster from your application on the DeltaBlue Cloud Platform is completely transparent. Our platform configuration will ensure the database is accessible via 127.0.0.1:3306, as you would access any local single-node database. Since Galera provides a multi-master setup, all cluster nodes can handle read and write operations. By default, we will loadbalance over all cluster nodes running in the same location as your application node(s), while using others as a fallback.
From our experience, this works great for a lot of applications. However, some applications might encounter issues with deadlocks when write operations are being spread over multiple nodes. In order to keep the additional benefits from read operations being loadbalanced over multiple nodes while avoiding deadlocks for write operations, we will need to ensure only 1 node is being written to. This is where ProxySQL comes in.
ProxySQL has multiple features that can improve the way your application interacts with your MySQL database. You can read all about these features on their website: https://proxysql.com. In this blog post, we will focus on setting up a read-write split configuration, specifically set up for a Percona XtraDB Cluster running on the DeltaBlue Cloud Platform.
Configuration steps
Set up MySQL cluster and ProxySQL instances
-
In order to set up a MySQL cluster on the DeltaBlue Cloud Platform, we will need to create an application first.
-
Open app.delta.blue. If you don't have an account yet, you can register here
-
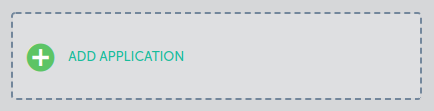
Create or open a project and navigate to the environment you want to add the MySQL cluster to. Create a new application if you have no existing application yet.
-
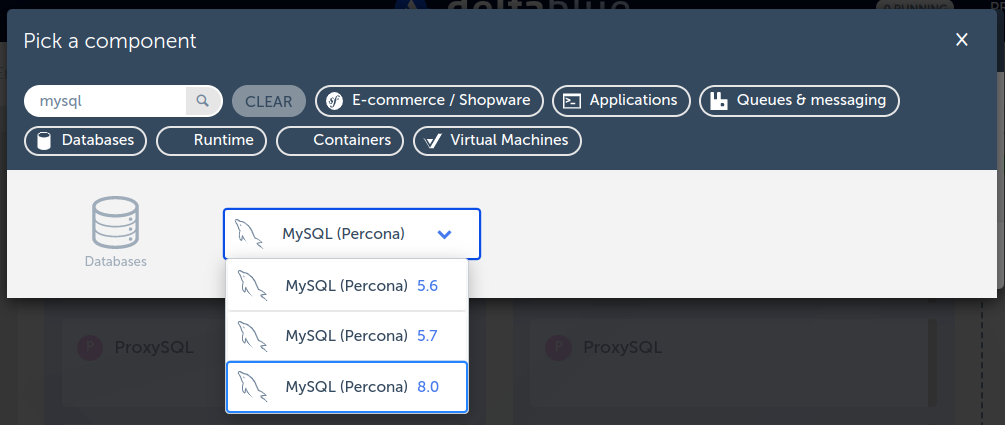
Add the MySQL component to your application.
-
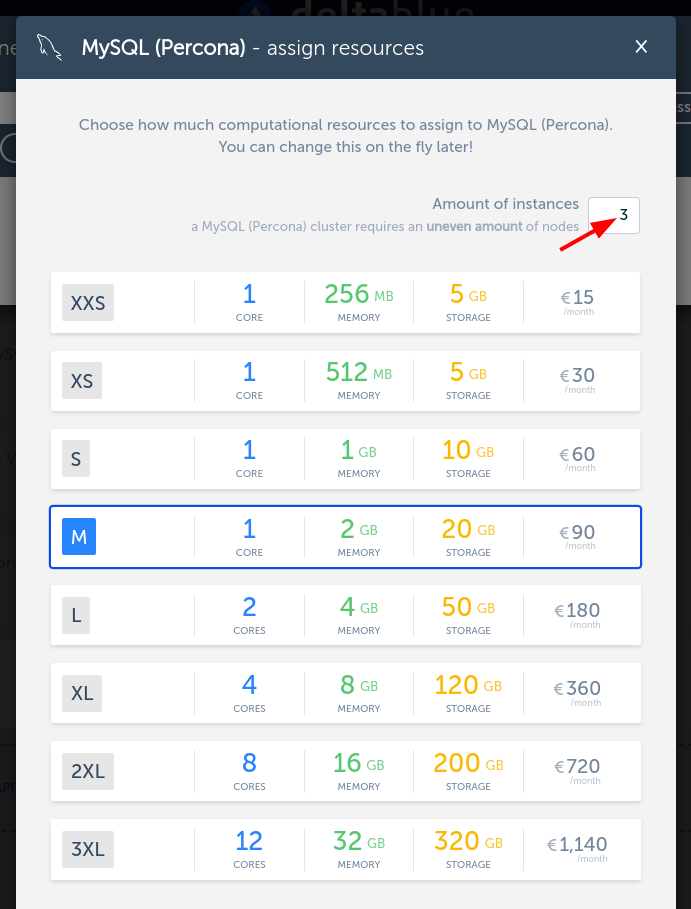
Make sure to set the instance count to 3 (or higher). This will ensure a Percona XtraDB Cluster configuration will be created.
-
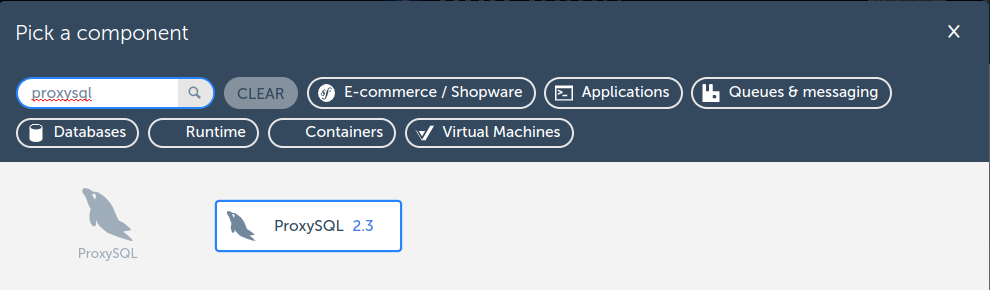
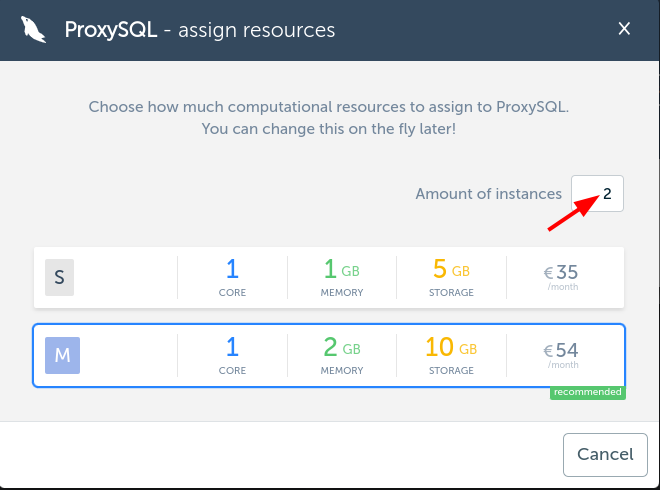
Add the ProxySQL component.
-
Increase the instance count to 2 (or higher). We still want to ensure this setup is high available and there will be no single point of failure.
-
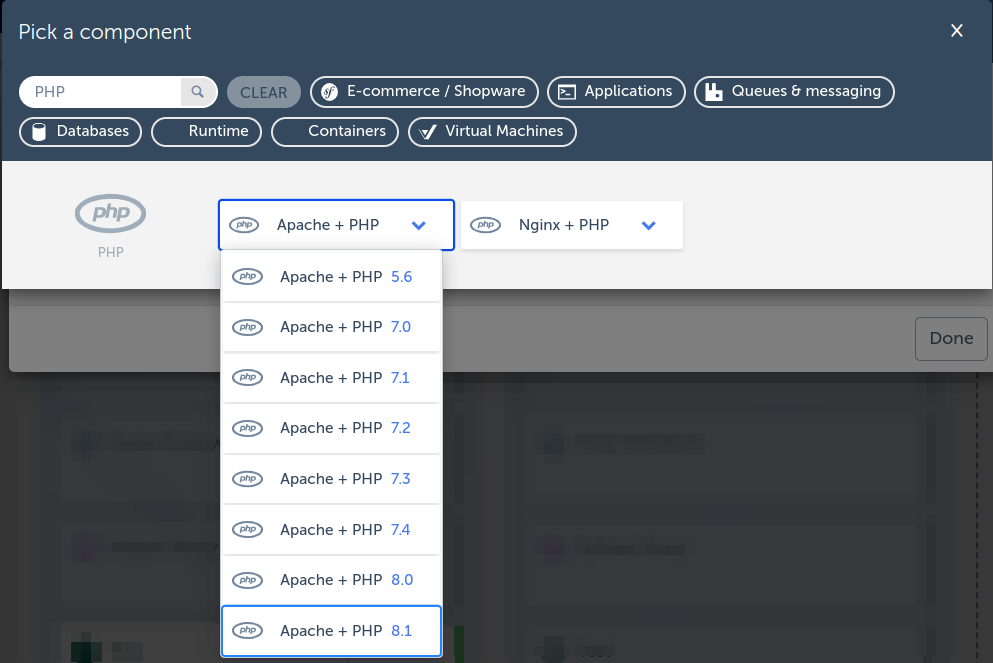
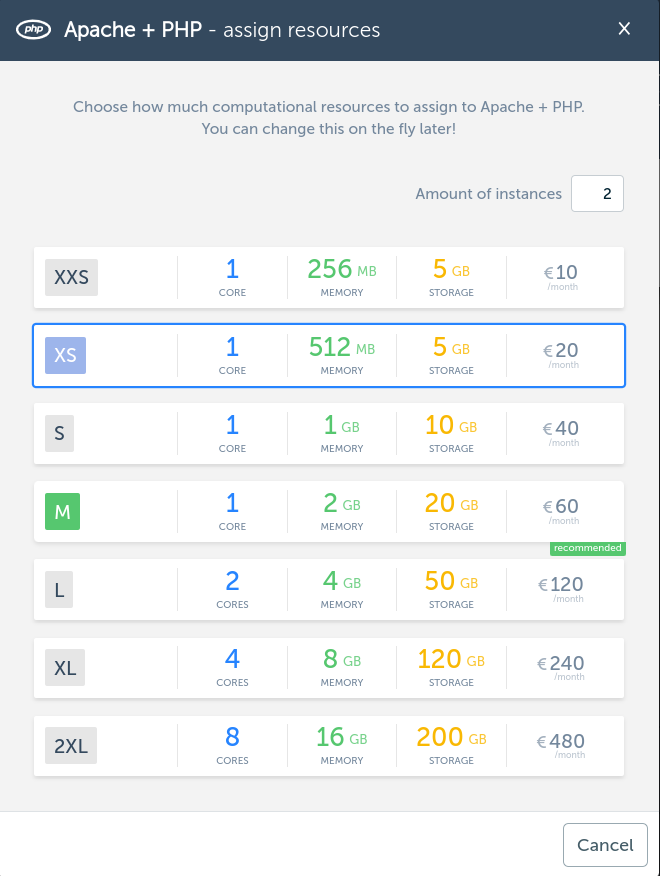
In this example, we will also be adding a PHP 8.1 component, which we can use to access the database later.
-
We will also set the instance count to 2 to ensure the application itself is high available as well, and we will load balance over these instances (shown below).
-
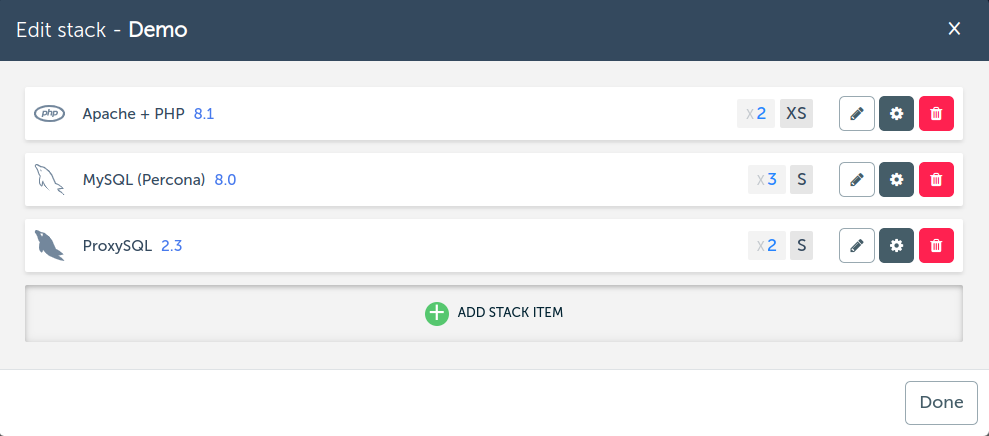
Your application stack will now look similar to the image below. You can now launch the application.
-
Once the application is launched, you can see all stack items running with the selected number of instances.
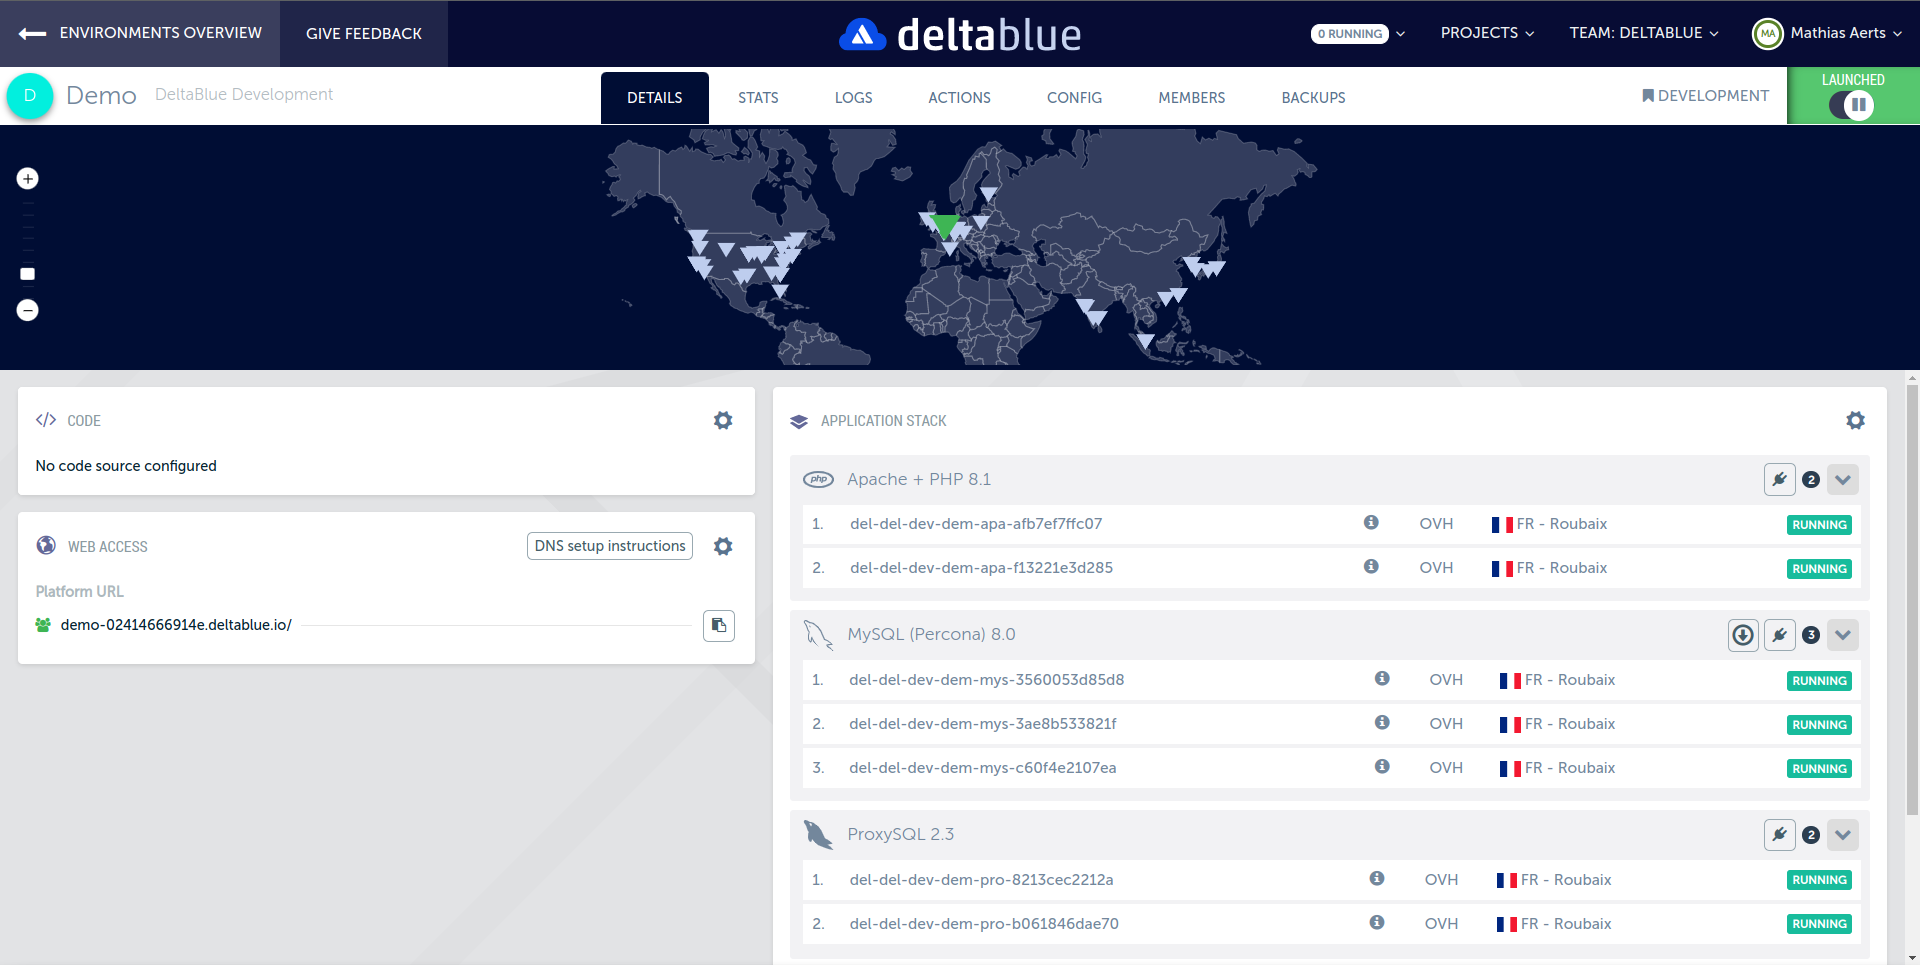
-
Create a database and user using
Config > MySQL Percona > Create database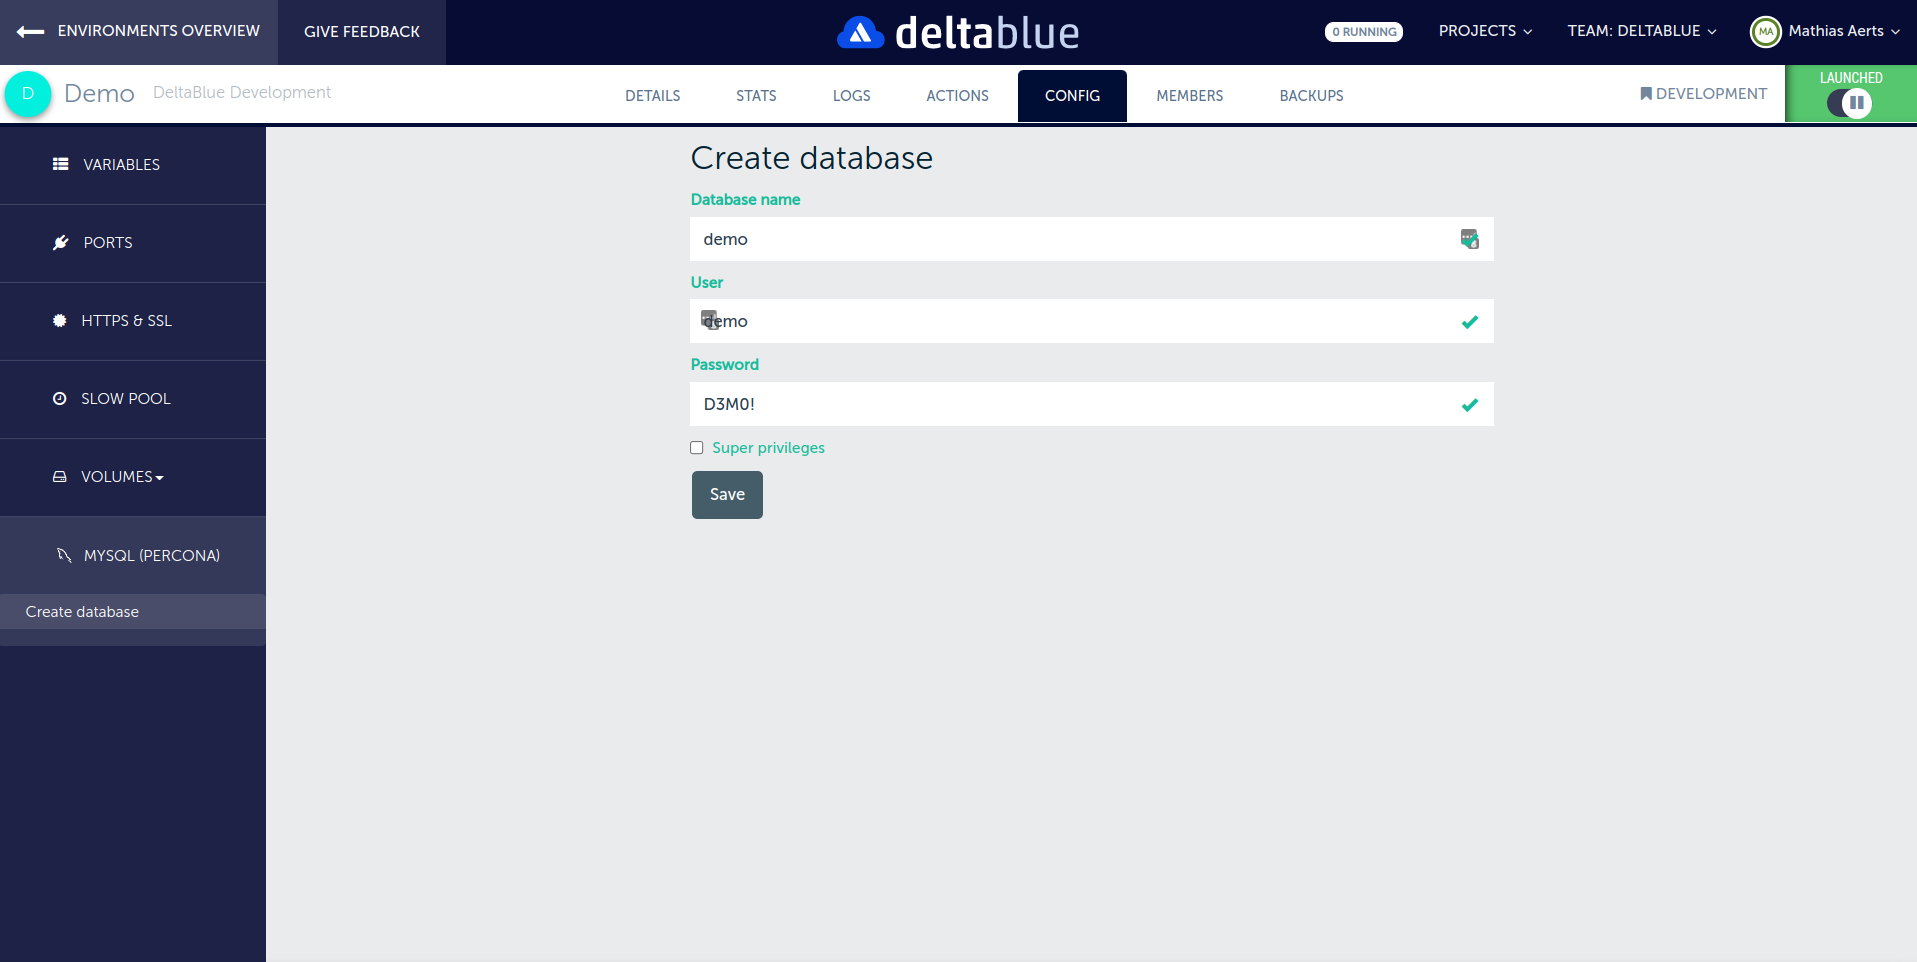
-
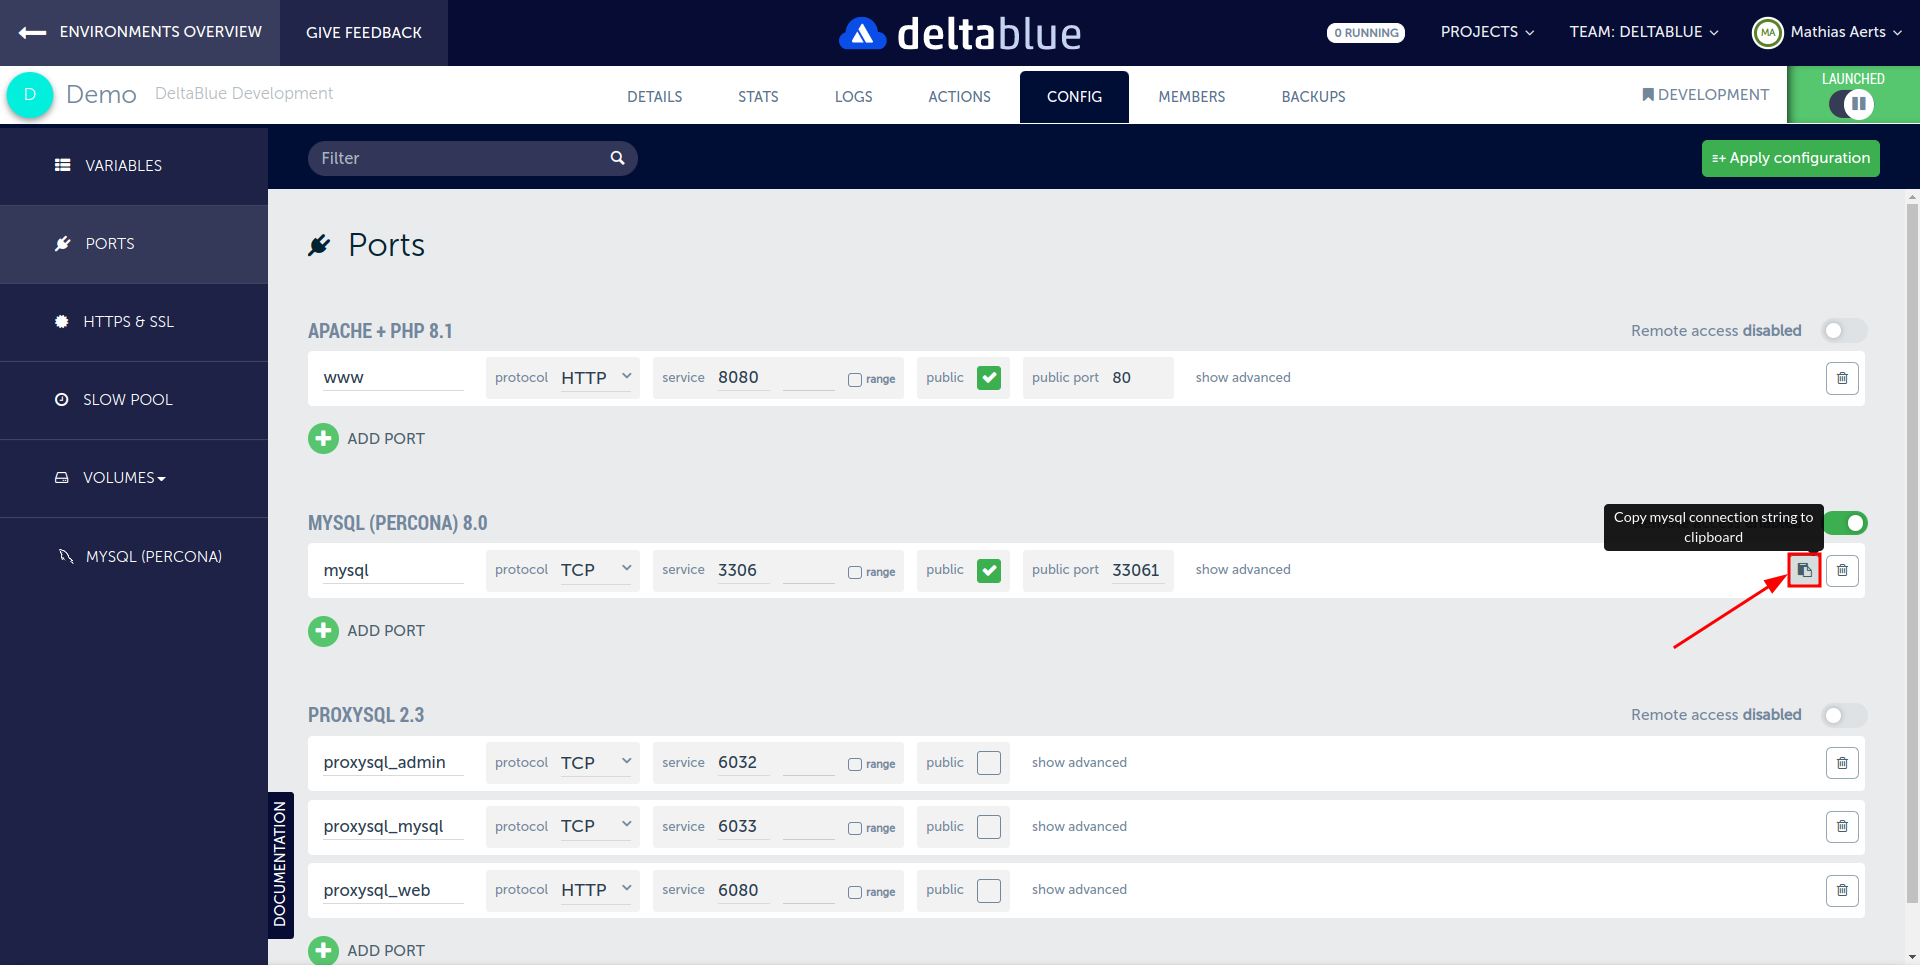
Enable remote access (only for demo purposes!).
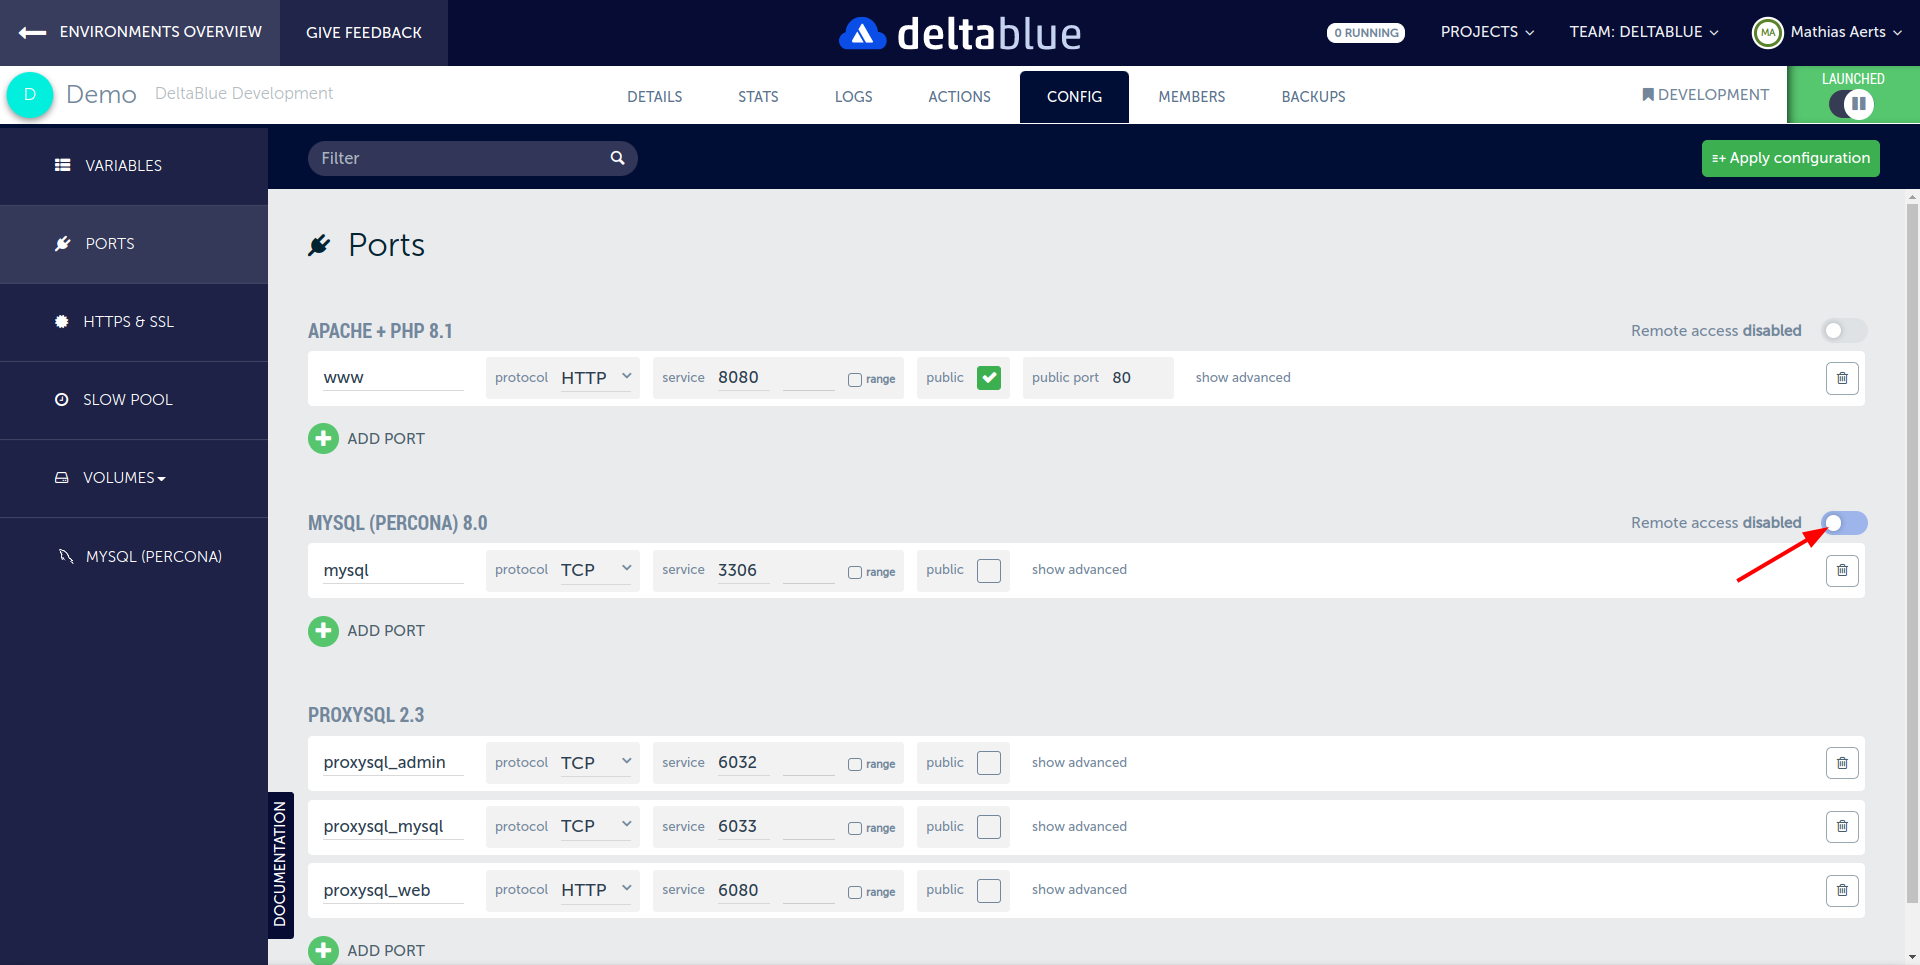
-
Make sure to configure an IP whitelist for additional security and then save and apply the port configuration.
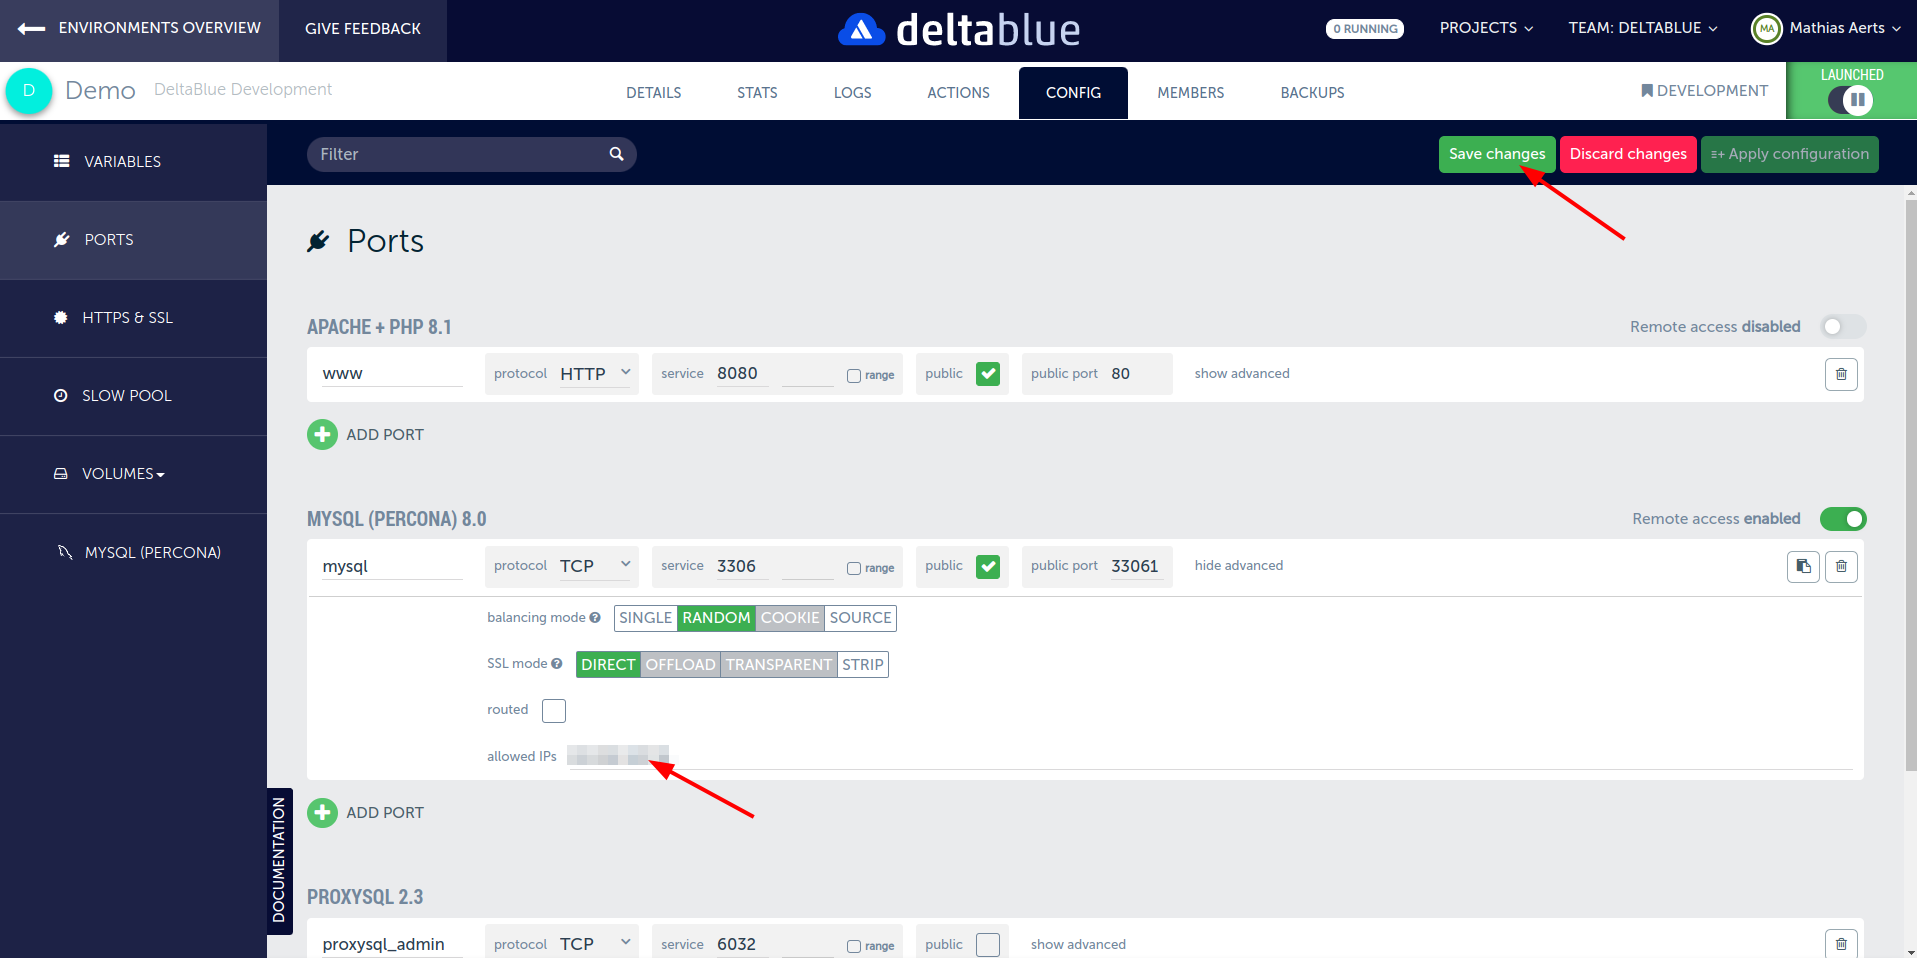
-
Once your database cluster is up and running, you can use the MySQL connection string to connect to it.
-
After you've successfully connected, create a
monitoruser in MySQLCREATE USER `monitor`@'%' IDENTIFIED BY 'monitor';This user doesn't need access to any database, but will be used by ProxySQL to validate the health of the individual MySQL nodes.
Configure ProxySQL
-
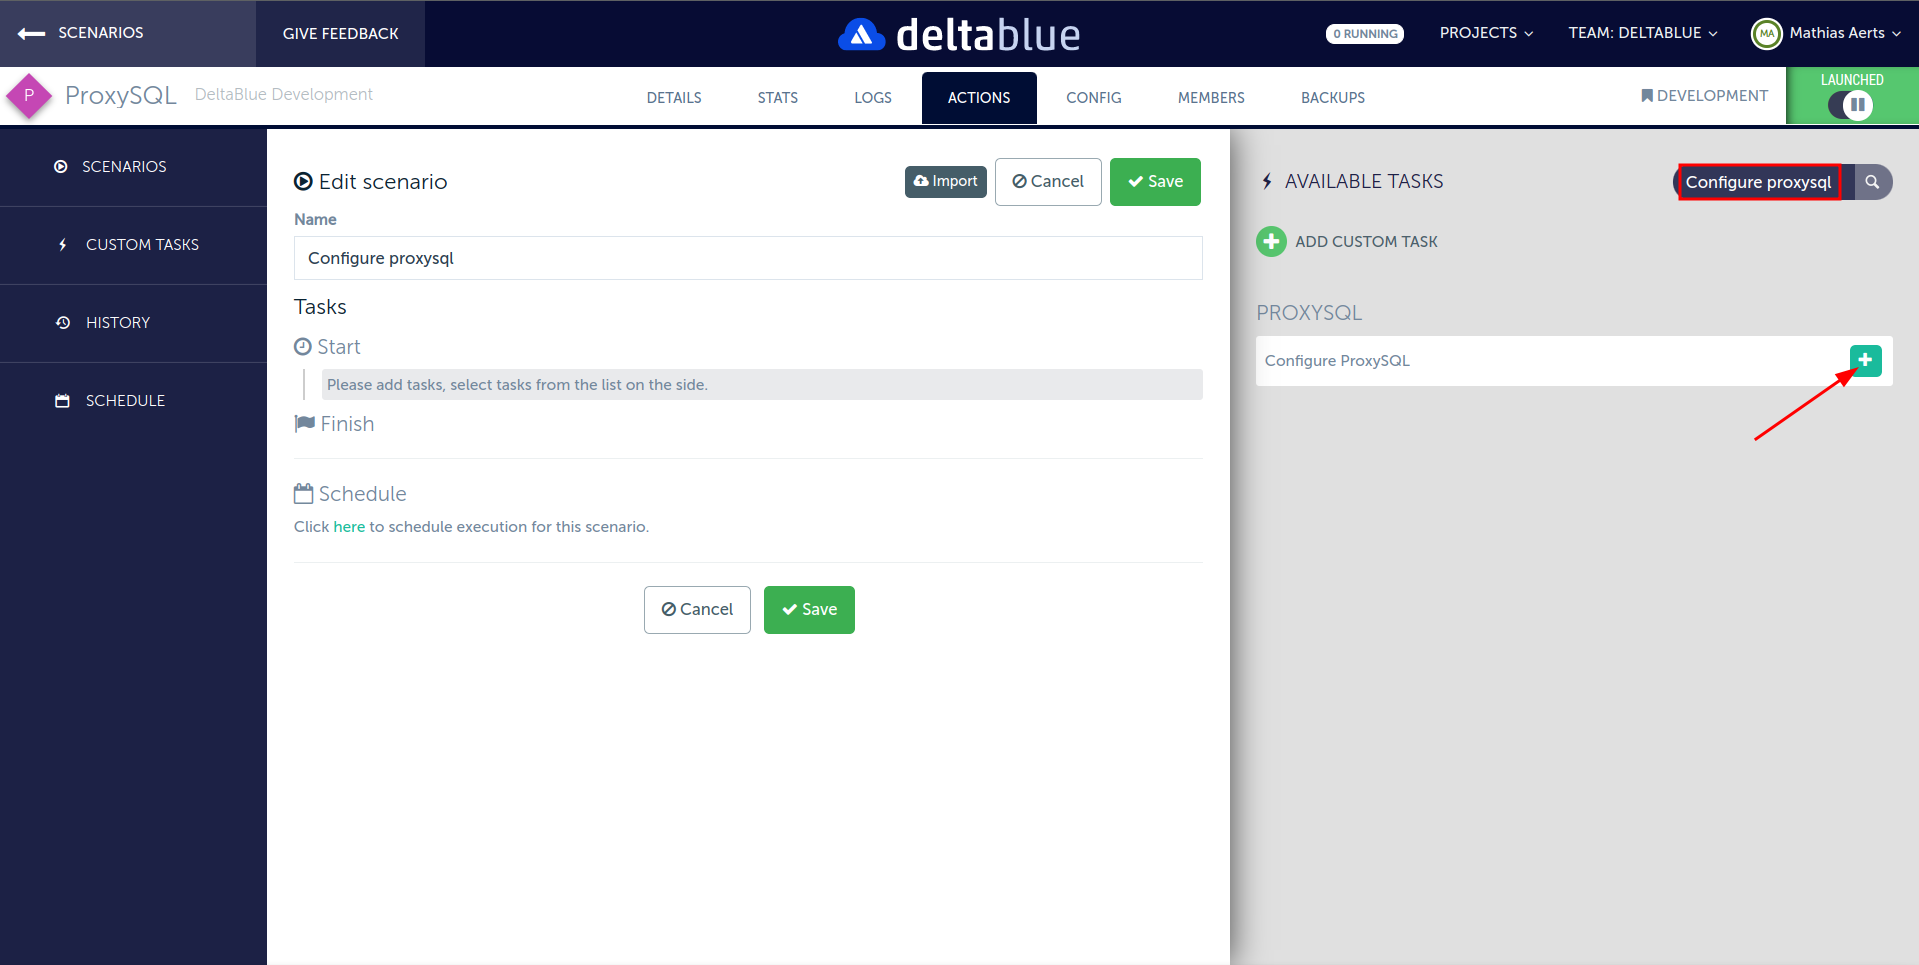
We'll need to let ProxySQL know which MySQL servers it can connect to and how it should behave. We've created a scenario action that will allow you to configure ProxySQL with all necessary parameters.
-
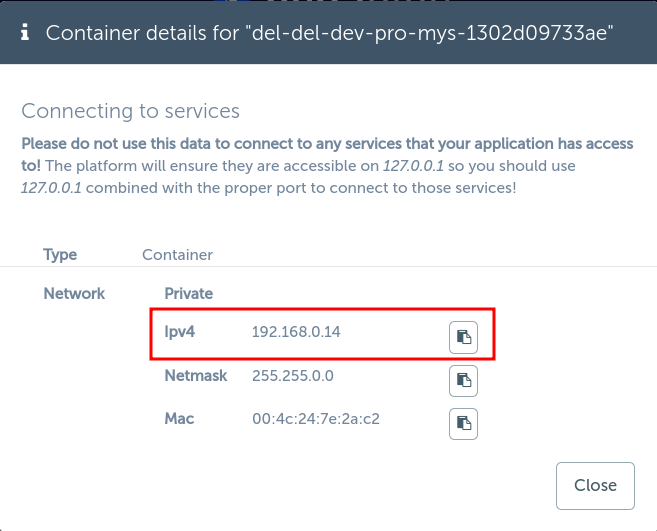
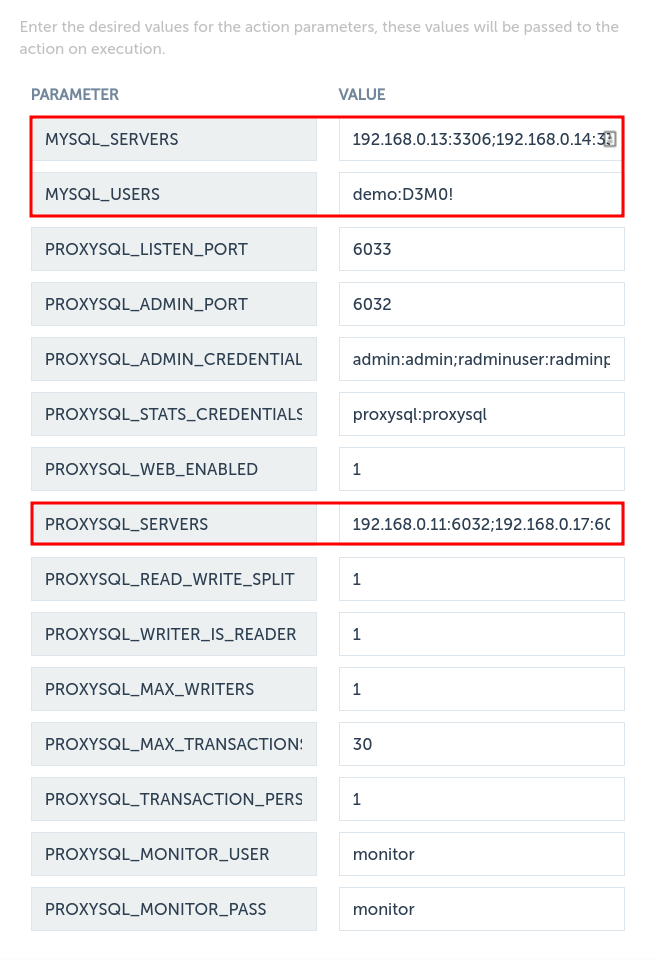
Note the internal IP addresses and used ports (default
3306) for all MySQL instances as we'll need to configure these in ProxySQL.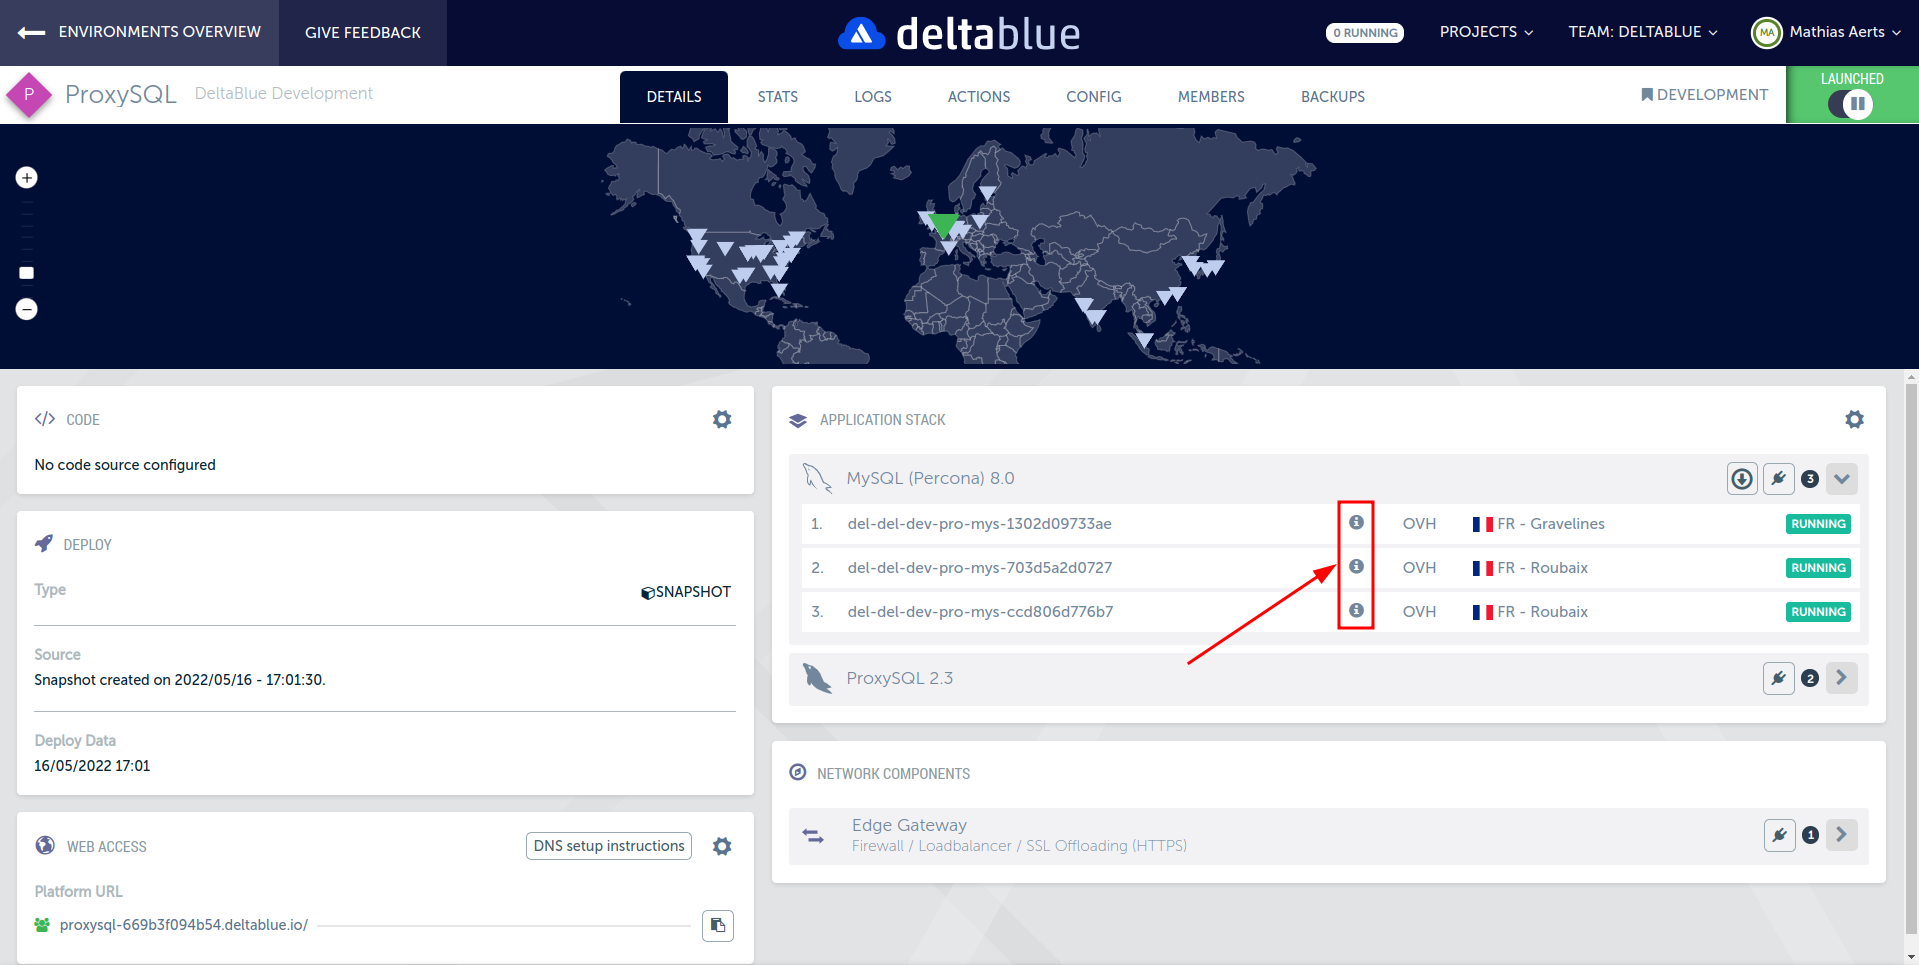
-
Similarly, we will also need all internal IP addresses and management ports (default
6032) for the ProxySQL instances, as they will communicate with each other as well for configuration updates.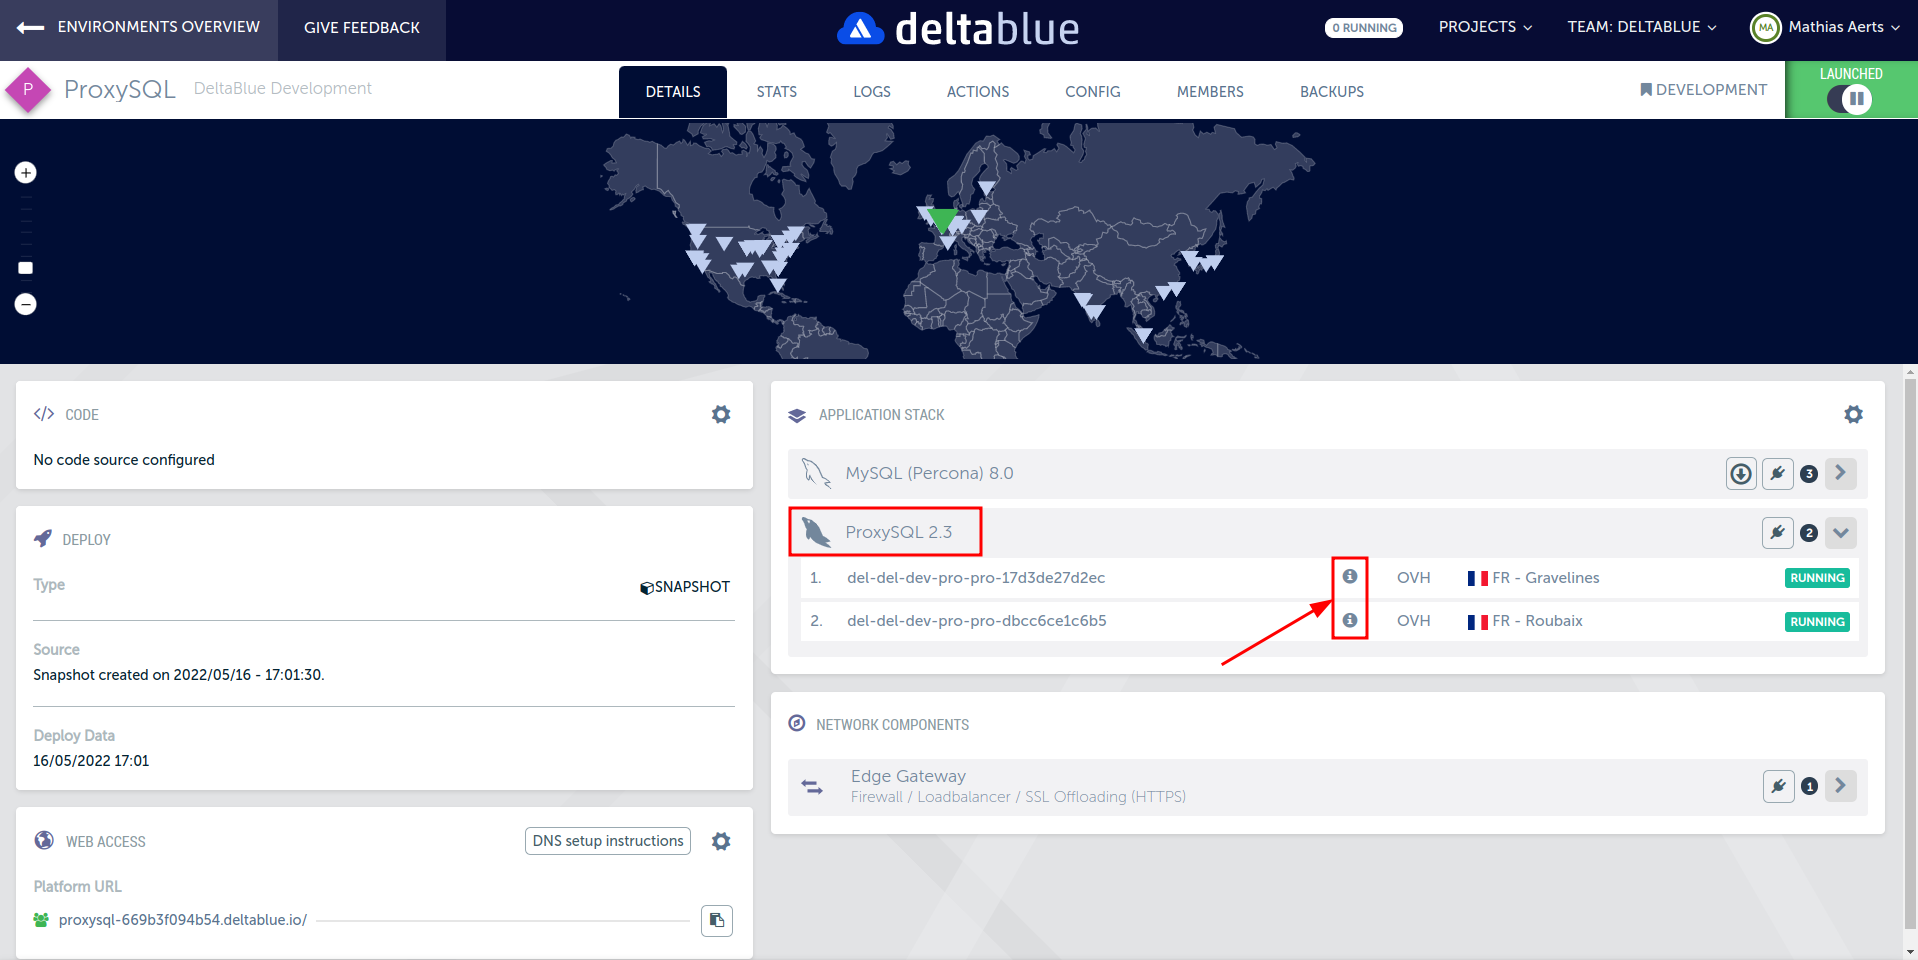
-
We will also need to add all MySQL credentials to ProxySQL. All of these parameters can be configured as semicolon separated (
;) strings in theConfigure ProxySQLscenario action.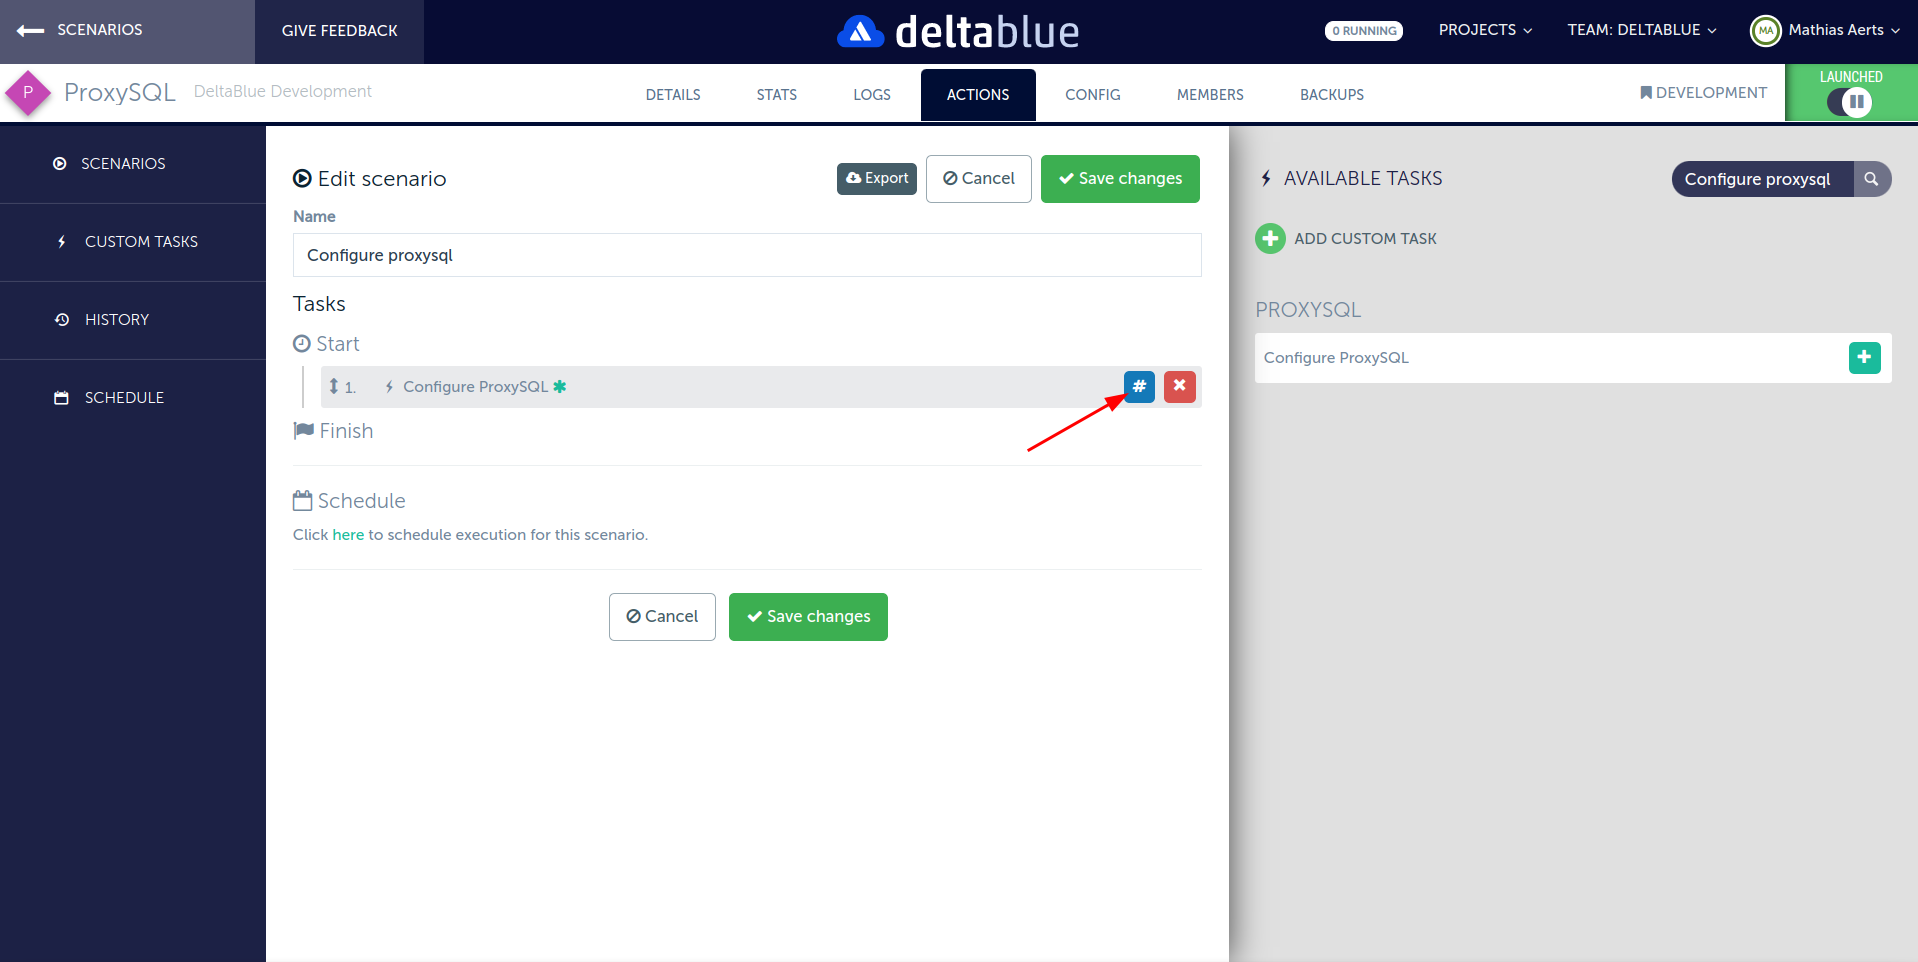
-
The parameters for this action also allow you to change the ProxySQL behaviour. You can choose whether writer nodes should also be used for reading, how many writer nodes there should be, and enable or disable read-write splitting.
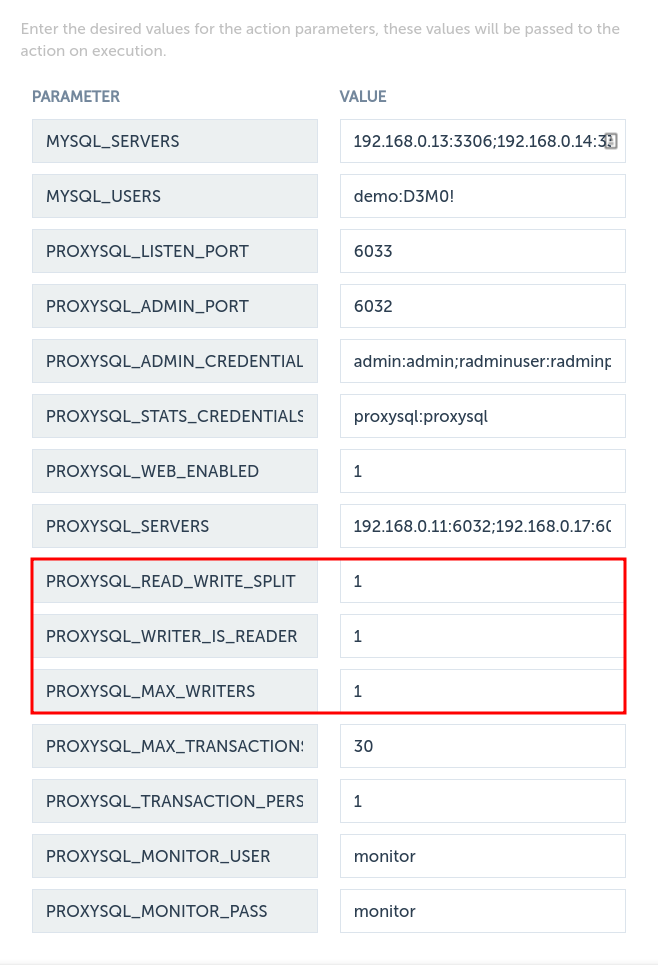
You can also set administrator passwords here. For demo purposes, we will keep these at the default values. Of course, it is advised to set a safe password for production usage.
-
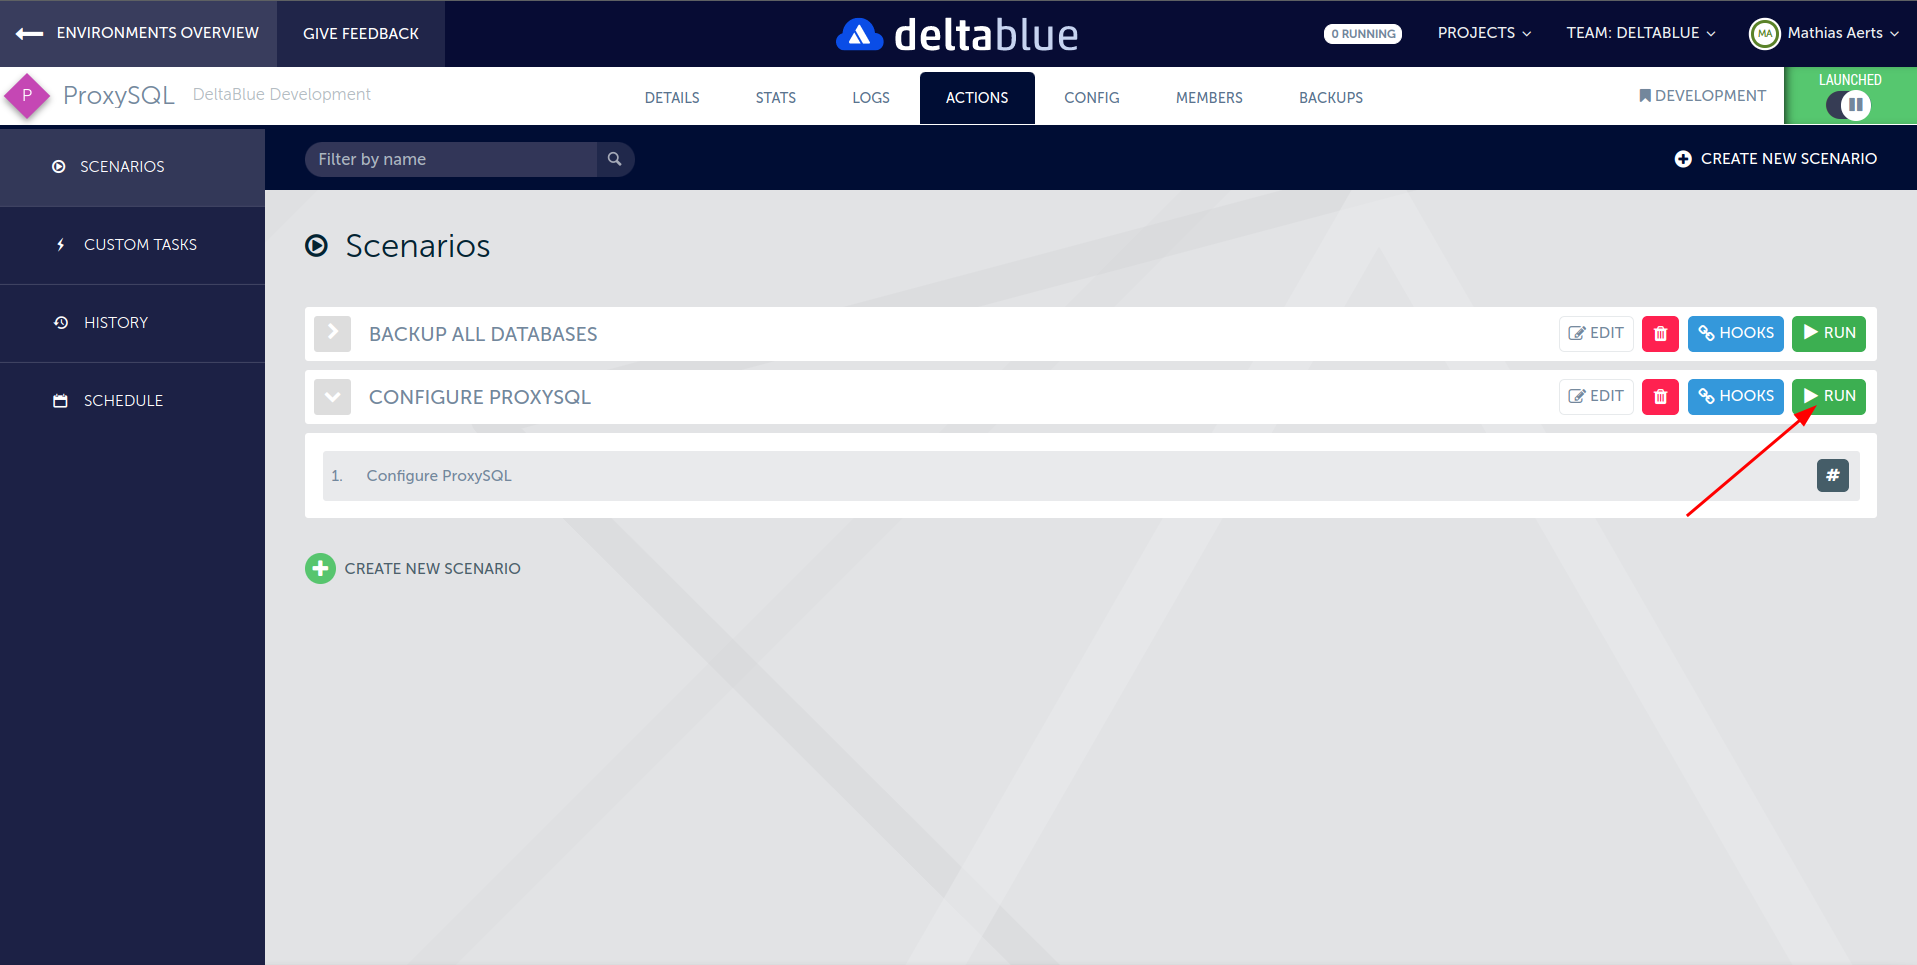
Once all of these parameters are set, we can run the scenario to configure ProxySQL.
By default, ProxySQL will listen on TCP port
6033. In this example, we will keep it at the default. Note that this can be changed to the MySQL default3306for maximum transparency. In that case, the configuration for the MySQL nodes will need to be adjusted to listen on a different port to prevent conflicts, e.g.3307. (If MySQL nodes are set up in a different app from ProxySQL, this change is not necessary)
Validate configuration
user avatar user avatar
Once the configure scenario has finished, we can validate that ProxySQL is working as expected. Enable SSH for the ProxySQL component and connect to it. Once connected, we can open a MySQL connection to the ProxySQL management port 6032. Use the admin credentials set in the parameters above:
mysql -u admin -padmin -h 127.0.0.1 -P6032 --prompt 'ProxySQL Admin> '
ProxySQL uses a MySQL-like management interface. From this prompt, you can use queries to view the server status and adjust the ProxySQL configuration.
For example, the following queries can be used to view the current status:
select * from runtime_proxysql_servers;
In our case, this will display our 2 ProxySQL servers with their configured IP addresses:
+--------------+------+--------+-----------------------+
| hostname     | port | weight | comment               |
+--------------+------+--------+-----------------------+
| 192.168.0.17 | 6032 | 0      | ProxySQL 192.168.0.17 |
| 192.168.0.11 | 6032 | 0      | ProxySQL 192.168.0.11 |
+--------------+------+--------+-----------------------+
2 rows in set (0.00 sec)
In order to check if our read-write split is working as expected, you can use the following query:
select * from runtime_mysql_servers;
In the query output, you can see which servers are assigned to which hostgroups and their current status. MySQL nodes that are in the writer hostgroup but are not the active writer will have the status SHUNNED.
+--------------+--------------+------+-----------+---------+--------+-------------+-----------------+---------------------+---------+----------------+---------+
| hostgroup_id | hostname     | port | gtid_port | status  | weight | compression | max_connections | max_replication_lag | use_ssl | max_latency_ms | comment |
+--------------+--------------+------+-----------+---------+--------+-------------+-----------------+---------------------+---------+----------------+---------+
| 10           | 192.168.0.13 | 3306 | 0         | SHUNNED | 1      | 0           | 1000            | 0                   | 0       | 0              |         |
| 20           | 192.168.0.13 | 3306 | 0         | ONLINE  | 1      | 0           | 1000            | 0                   | 0       | 0              |         |
| 20           | 192.168.0.14 | 3306 | 0         | ONLINE  | 1      | 0           | 1000            | 0                   | 0       | 0              |         |
| 30           | 192.168.0.15 | 3306 | 0         | ONLINE  | 1      | 0           | 1000            | 0                   | 0       | 0              |         |
| 30           | 192.168.0.14 | 3306 | 0         | ONLINE  | 1      | 0           | 1000            | 0                   | 0       | 0              |         |
| 30           | 192.168.0.13 | 3306 | 0         | ONLINE  | 1      | 0           | 1000            | 0                   | 0       | 0              |         |
| 10           | 192.168.0.15 | 3306 | 0         | ONLINE  | 1      | 0           | 1000            | 0                   | 0       | 0              |         |
| 10           | 192.168.0.14 | 3306 | 0         | SHUNNED | 1      | 0           | 1000            | 0                   | 0       | 0              |         |
+--------------+--------------+------+-----------+---------+--------+-------------+-----------------+---------------------+---------+----------------+---------+
8 rows in set (0.00 sec)
In our configuration, we are using 1 active writer. Hostgroups are assigned as follows:
10: Writer nodes, will contain all nodes and inactive writers will have statusSHUNNED20: Backup writer nodes, automatically assigned. These nodes will beSHUNNEDin our writer hostgroup30: Reader nodes. Contains all nodes that can be used for reading.
Application usage
In order to check if our setup is working as expected, we've created a small PHP script that executes a SELECT and an INSERT query. We're selecting MySQL's @@hostname variable and also inserting this value into a demo table, which we then select again. This shows all writes are being executed by the same database node, while reads are being loadbalanced across all database nodes available.
-
The
demotable is created as follows:CREATE TABLE IF NOT EXISTS demo ( id INT AUTO_INCREMENT, hostname VARCHAR(255), PRIMARY KEY (id) ); -
Our PHP test script:
<?php // Inspired by https://phpdelusions.net/pdo $host = '127.0.0.1'; $port = '6033'; $db = 'demo'; $user = 'demo'; $pass = 'D3M0!'; $charset = 'utf8mb4'; $options = [ PDO::ATTR_ERRMODE => PDO::ERRMODE_EXCEPTION, PDO::ATTR_DEFAULT_FETCH_MODE => PDO::FETCH_ASSOC, PDO::ATTR_EMULATE_PREPARES => false, ]; $dsn = sprintf('mysql:host=%s;port=%d;dbname=%s;charset=%s', $host, $port, $db, $charset ); function printHostname($stmt, $type = 'read') { $typestr = sprintf('MySQL %s Node', ucfirst($type)); $row = $stmt->fetch(); if ($row === false) { printf('Failed to get %s', $typestr); return; } printf('%s: %s</br>', $typestr, $row['hostname']); } // Write system hostname printf('PHP Node: %s</br>', gethostname()); // Create database connection try { $pdo = new PDO($dsn, $user, $pass, $options); } catch (\PDOException $e) { throw new \PDOException($e->getMessage(), (int)$e->getCode()); } // Select MySQL hostname $stmt = $pdo->query('SELECT @@hostname AS hostname'); // Print hostname printHostname($stmt, 'read'); // Start new transaction $pdo->beginTransaction(); // Do insert $pdo->exec('INSERT INTO demo (hostname) (select @@hostname);'); $id = $pdo->lastInsertId(); // Select MySQL hostname from table $stmt = $pdo->prepare('SELECT hostname FROM demo WHERE id = :id'); $stmt->execute(['id' => $id]); $pdo->commit(); // Print hostname printHostname($stmt, 'write'); -
We will deploy this script using a scenario and then access it via a web browser. Example output after multiple refreshes:
PHP Node: del-del-dev-pro-apa-f4b16ee21f0e
MySQL Read Node: del-del-dev-pro-mys-1302d09733ae
MySQL Write Node: <b>del-del-dev-pro-mys-703d5a2d0727</b>
PHP Node: del-del-dev-pro-apa-a698d258b995 MySQL Read Node: del-del-dev-pro-mys-ccd806d776b7 MySQL Write Node: <b>del-del-dev-pro-mys-703d5a2d0727</b>PHP Node: del-del-dev-pro-apa-f4b16ee21f0e MySQL Read Node: del-del-dev-pro-mys-703d5a2d0727 MySQL Write Node: <b>del-del-dev-pro-mys-703d5a2d0727</b>PHP Node: del-del-dev-pro-apa-a698d258b995 MySQL Read Node: del-del-dev-pro-mys-1302d09733ae MySQL Write Node: <b>del-del-dev-pro-mys-703d5a2d0727</b>Here we can see that our test application is
- Loadbalancing over our 2 PHP nodes:
del-del-dev-pro-apa-f4b16ee21f0edel-del-dev-pro-apa-a698d258b995
- Loadbalancing read queries over all 3 MySQL nodes:
del-del-dev-pro-mys-1302d09733aedel-del-dev-pro-mys-ccd806d776b7del-del-dev-pro-mys-703d5a2d0727
- Consistently executing write operations on the same MySQL node (shown in bold):
del-del-dev-pro-mys-703d5a2d0727
- Loadbalancing over our 2 PHP nodes:
Conclusion
ProxySQL proves to be a great addition to an existing Percona XtraDB / Galera cluster, that provides a lot of features and flexible configuration. If your application is having trouble with deadlocks that may be caused by executing writes on multiple nodes, setting up a read-write split using ProxySQL as shown above can eliminate these issues, while preserving the benefit of a distributed database cluster and high available setup.
DeltaBlue Cloud allows you to configure a high available application without having to worry about networking and loadbalancing configurations for your application nodes. Setting up a database cluster is completely transparent for your application, making it accessible without any custom implementation.
If you would like to replicate this setup, click here to get started!
Let's talk!
Have a question, need advice, or just want to learn more about what we offer? Our team is here to help! Whether you're exploring solutions, planning your next move, or already deep into a project. We'll connect you with the right experts to give you practical, honest input tailored to your situation.
From technical questions to partnership opportunities, we're all ears. Drop us a line and let's see where we can make a difference.
Contact us